Create and Manage Online Event Registration Forms using WPForms
Online event registration and RSVP forms are a great way to streamline the process of registering for an event. Online Event Registration provides an easy way to collect basic information about the attendees like name, email address, and phone number. You can also create advance forms for more information and also take event payments online on your site.
Why use WPForms to create an Online Event Registration Form
WPForm is the #1 Form builder for WordPress sites. It has integration with popular newsletter service providers and payment gateways like Stripe, PayPal, convertKit, MailChimp and many more. With WPForms you can quickly setup your forms to sell event tickets and with Views for WPForms you can manage and display the event registration data on the site frontend.
Below is the step-by-step guide on how to create and manage Event Registration Forms using WPForms and Views for WPForms WordPress plugins.
STEP 1: Install the WPForms Plugin
The first thing you need to start selling event tickets on your site is to install the WPForms plugin. You will need WPForms Pro to take payments and store attendees information in the database.
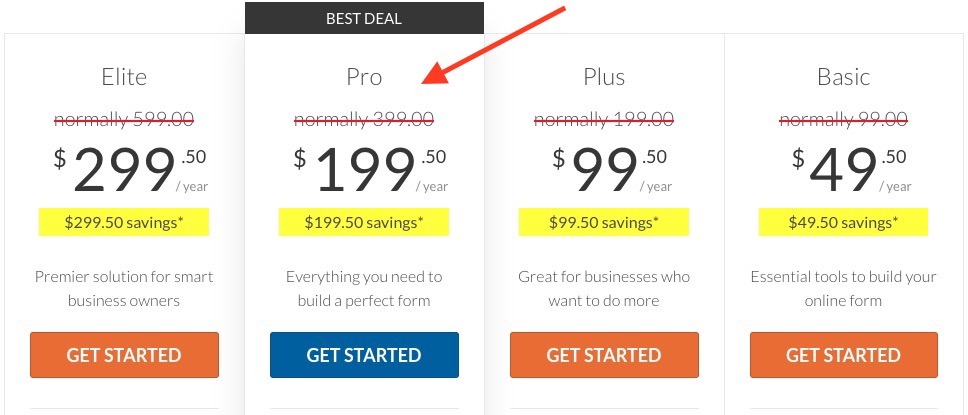
STEP 2: Create a new form and install the Event Registration Form Template
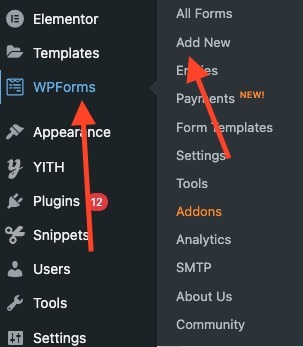
Go to WPForms => Add New to create a new form.
Search for Event Template in the list of premade templates.
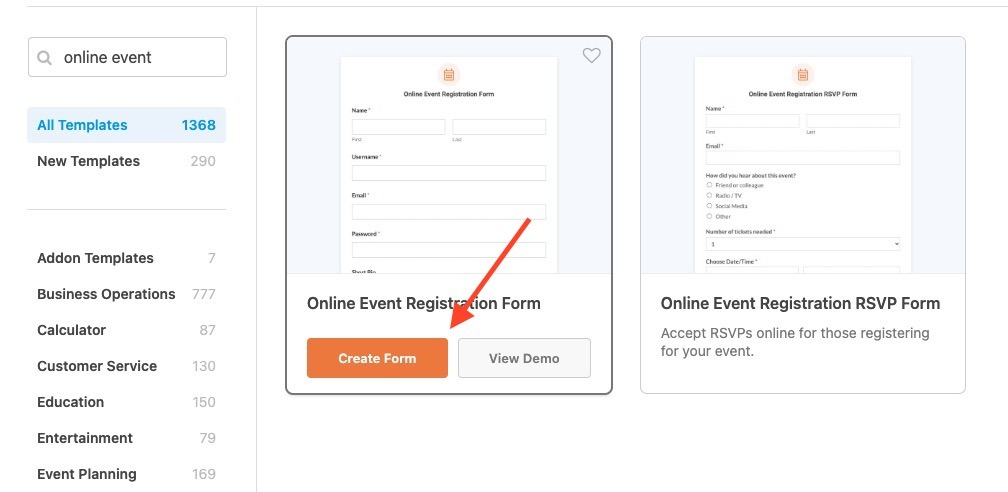
Click on Create Form to create the Event Form. This Form will have all the basic fields already added to it. Now in the next step let’s customize this Form as per your needs.
STEP 3: Customize the Event Registration Form Template
To customize the form fields you have to click on the field you want to edit and update it’s setting displayed on the left column.
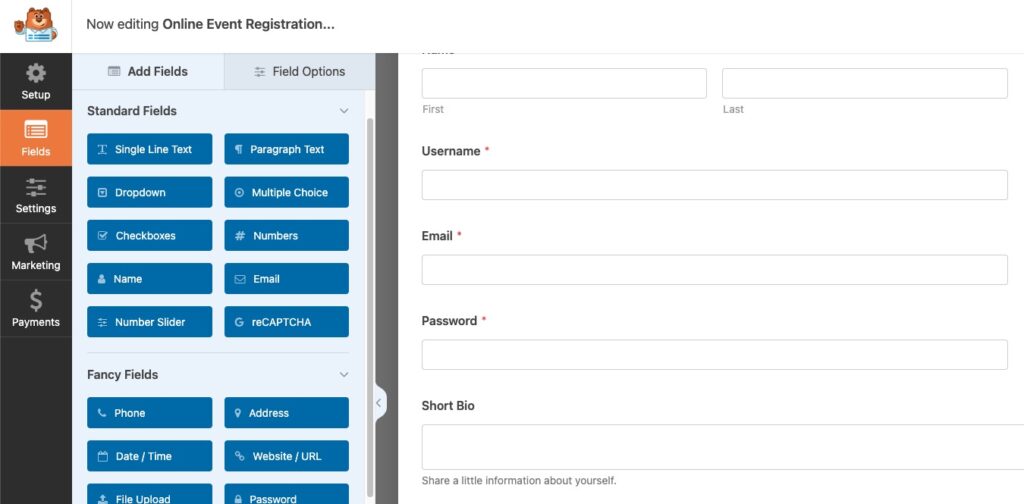
You can delete or add new fields as per your needs. WPForms has different field types to collect different types of data. By default, you will see the below fields in your form.
- Name
- Username
- Password
- Short Bio
- Address
- Date/Time
You can remove any field that you don’t need and add more fields if you need to.
STEP 4: Set up the Event Registration Form Confirmation Message
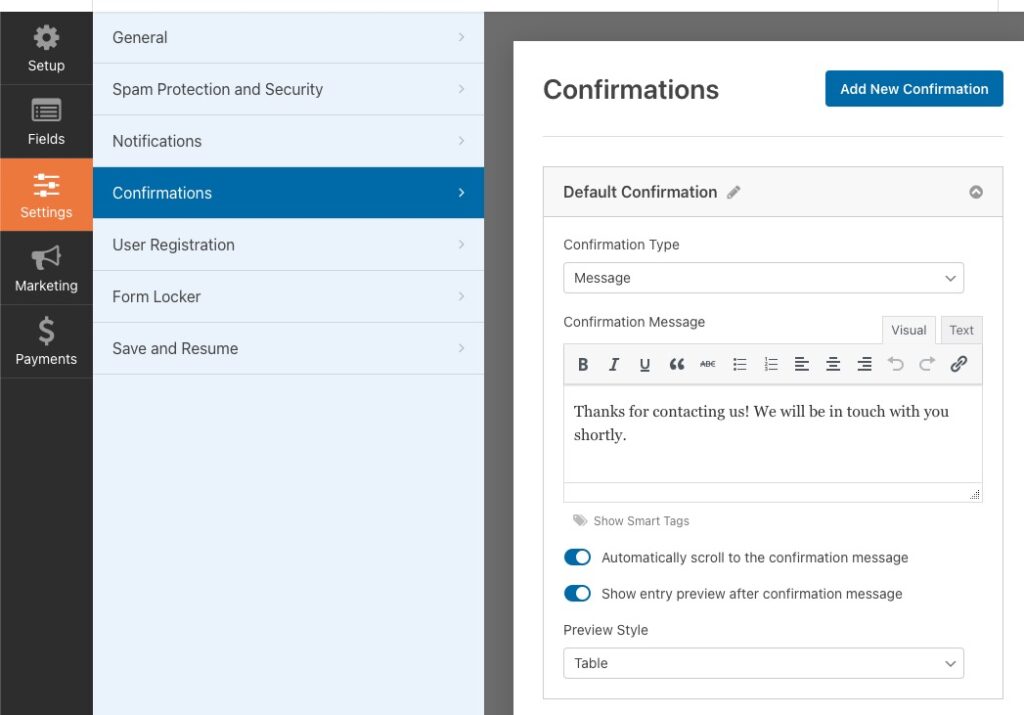
A form Confirmation message is displayed after the user has successfully submitted the form. You can show the user a message with the information about what they should be expecting from you.
To set up the Form confirmation message Go to Settings => Confirmations.
STEP 5: Set up the Form Email Notifications
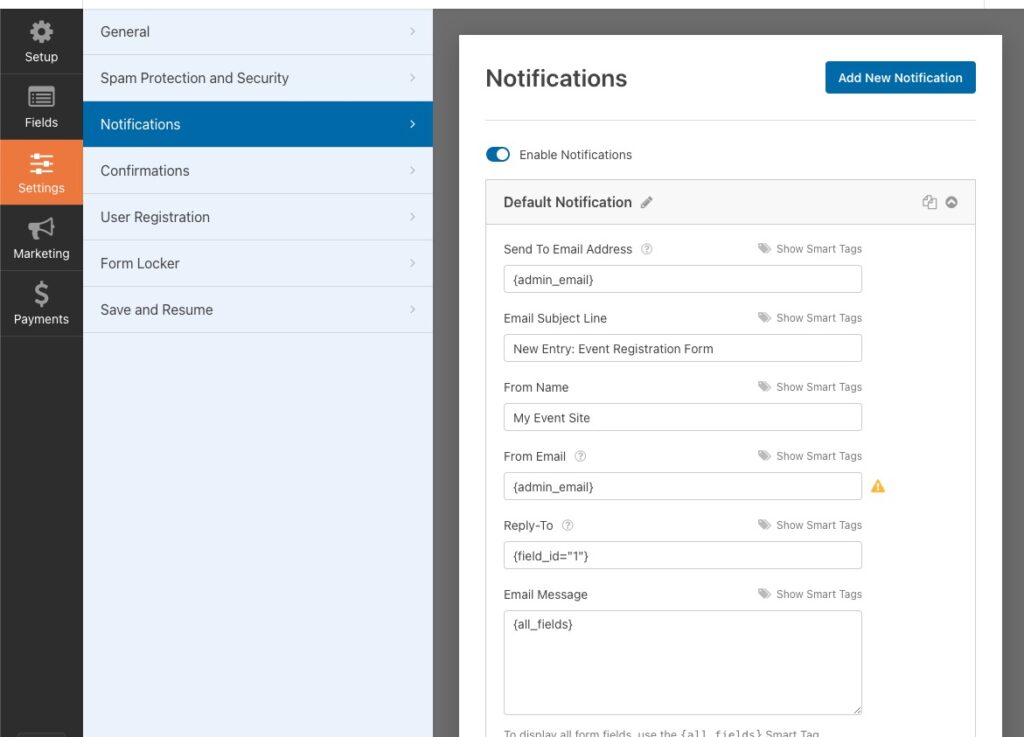
Form Email Notification setup is very important as it sends you email notifications instantly as soon as the form is submitted on your site.
To configure notifications go to Settings => Notifications
That’s it, Now your Event Registration Form is ready to collect Event registrations.
